
Replacing a PURE Evoke Flow Display
** UPDATED 15th April 2026 **
URLs to eBay sources of OLEDs have been updated. Some legacy item numbers are no longer available, their seller advised me. A new URL is given below.
** UPDATE 19th November 2025 **
A contributor has added information describing how he successfully repaired his PURE Evoke D4 display, see below.
** UPDATE 17th January 2023 **
Dear visitors,
For the latest Evoke display news, please check through all the comments section (best start with newest/ last and work backwards) about replacing this display.
The current suggested source for displays is Shenzhen Liyuan Huida Technology Co who have a good history of offering individual displays for various PURE radios. See their web page and contact form (Jack Wan) at the bottom. You might also find displays on Ebay - see below.
The reader comments here contain a wealth of background, advice and experience from other PURE repairers and are well worth wading through.
Some radios (eg the Avanti Flow) can turn out to be complex with lots of scope for problems, so please consider whether you want to gamble on fitting a new display yourself. Please note I cannot provide any specific advice on repairing or fixing problems, all the information I have is published on my website.
Lastly, folks, I'm sorry if this has become a bit convoluted or messy. My blog wasn't designed for such heavy traffic or 'chat' and large numbers of comments, and I'm trying to keep things going as orderly and easy to use for everyone (myself included!).
Please remember, I can't retain or display personal email addresses etc on this web site, though I have successfully put a few people in touch with each other.

PURE SSW-1817 Power Supply Repair
A reader has shared details of replacing the power transistor and capacitors on this common switched-mode power supply used in several PURE DAB radios, more details here
Other sources of suitable OLEDs for PURE Evoke / Flow / Avanti Flow etc
17th January 2023
New PURE Evoke 1S 2S D4 D6 etc Marshall Mio Display Screen
https://www.ebay.co.uk/itm/366331090131 [new account]
NOT suitable for the Pure Evoke Flow, Avanti Flow, Oasis Flow, F4
Some repair notes for the Evoke 2S are in this PDF.
20th February 2020
On Alibaba - Shenzhen Liyuan Huida Technology Co (Jack Wan) had offered some new stocks of higher brightness OLEDs and are known to offer a good service to UK individuals. Several people said they have been very successful replacements recently. See https://www.alibaba.com/product-detail/22pin-yellow-white-3003319301002-Pure-Evoke_60671545961.html [19/11/25 - now clicks through to alternative sources on Alibaba]
PURE EVOKE 1s (early version)
I've received step by step guide notes on swapping these displays which are now here.
PURE Avanti Flow Display
Looking to replace a PURE Avanti display instead? I've written up instructions here.
PURE Evoke 1S Marshall Display
13/6/2019 - A reader has posted instructions on replacing the (same) OLED on an Evoke 1S Marshall in the reader comments, please scroll through them to the end.
PURE Sirocco 550
2/1/2020 - A reader has posted instructions on replacing the (same) OLED on a Pure Sirroco 550 in the reader comments, please scroll through them to the end. (Happy New Year by the way.)
PURE Evoke D4
My thanks to Bruno in France who's done an excellent walk-through and write-up with photos for repairing his PURE Evoke D4 here
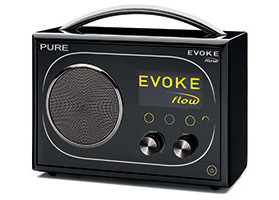 In 2008 I received a PURE Evoke Flow DAB/ Internet radio as a birthday gift from my dear mum and until the battery failed this cherished radio receiver had doubled as a portable Internet tuner (thanks to a Chargepak rechargeable battery) and a bedside radio with dual alarms and wireless remote control. The radio recharged overnight ready for a busy day ahead, seated on my desk. The PURE Evoke Flow opened up a new world of online streaming radio with integral services such as Pure Sounds (rainfall, babbling brooks, breaking waves etc.) and BBC Listen Again, all of which, sadly, have long since been discontinued and are greatly missed.
PURE was launched back in 2001 by the higher-end VideoLogic division of UK graphics chipmaker Imagination Technologies. This was at a time when DAB radio was emerging as an exciting new radio standard and PURE was being positioned as a premium consumer brand. Imagination hit hard times and the PURE brand itself was sold off in 2016. Imagination’s major customer Apple also pulled the plug, deciding to make its own graphics chips instead, and a bitter trade dispute followed. Imagination was snapped up by a Chinese/ US private equity firm in 2017. The PURE brand still lives on, thanks to Austrian financial backers.
A Display of PURE Genius
One of the PURE Evoke Flow’s finest features was its yellow OLED graphics display which needed no backlight and had much greater clarity, luminance and viewing angle than an ordinary LCD did. As every Evoke Flow owner doubtless knows by now, unfortunately the display would fade after a few years (say six or more) as its organic element deteriorated until the display blanked out altogether, rendering the radio nearly useless.
Sad to say, the same fate befell my own radio and I have searched in vain for a replacement display for several years. Spares became unobtainable once RS Components discontinued the Bolymin 128 x 64 pixel BL12864KERNH$ (Stock No. 668-6124). I failed to find any foreign source that would ship a single replacement display (but read on).
New OLED Display for PURE Evoke Flow, Avanti, Evoke-1S.
The search for a new display having defeated me (and I don’t give up easily), in 2018 I was really delighted to learn that an enterprising individual has managed to source and import replacement yellow OLED displays that fit the PURE Evoke Flow, Avanti Flow and Evoke-1S Marshall, PURE's guitar amp style DAB radio.
I feared it might be too good to be true but, sure enough, after placing an order online with the UK seller AJSDyno a small carton soon arrived containing a new display for my ten year old radio. Perfect! They have since run out of stock so you will have to source one yourself from eg China (read the comments section later for guidance).
Next was a learning curve to figure out how to fit the new part, so here’s my photo sequence and instructions to help those wanting to replace their displays with minimum fuss.
Only basic tools are needed but a lot of ‘sympathy’ and some dexterity when handling delicate parts is also required: allow yourself half an hour of quality time and work carefully, don’t rush things and you should be fine.
DIY Instructions to replace a PURE Evoke Flow OLED
Unplug the radio from its a.c. adaptor and if a Chargepak battery pack is fitted, remove it. The display is accessed from the rear of the radio, which is secured by six Philips screws, so start by removing them.
;) Remove 6 x Philips screws holding in the rear panel [click to see]
Remove 6 x Philips screws holding in the rear panel [click to see];) ... and swing the panel out, as if it's hinged on the left hand sideThe rear panel can be gently prised out with a plastic spudger or similar tool, swinging it gently out from the right and allow it to rest on the worktop. It carries the main board and some interwiring. Note how some wires and ribbons hook the mainboard to the SnoozeHandle, loudspeaker, front panel controls and the Imagination Technologies display controller.
... and swing the panel out, as if it's hinged on the left hand sideThe rear panel can be gently prised out with a plastic spudger or similar tool, swinging it gently out from the right and allow it to rest on the worktop. It carries the main board and some interwiring. Note how some wires and ribbons hook the mainboard to the SnoozeHandle, loudspeaker, front panel controls and the Imagination Technologies display controller.
;) The rear panel resting on the workbench. Take care not to strain the taut blue wire (SnoozeHandle PCB)A word of warning,
The rear panel resting on the workbench. Take care not to strain the taut blue wire (SnoozeHandle PCB)A word of warning,
THE SINGLE WIRE (ARROWED) CONNECTING THE SNOOZEHANDLE IS QUITE TAUT. IT IS SOLDERED AT BOTH ENDS AND CANNOT BE DISCONNECTED WITHOUT DESOLDERING IT. TAKE CARE NOT TO TUG OR STRAIN THIS WIRE OR THE TINY PCB CONNECTING THE SNOOZE HANDLE MAY BE DAMAGED!
So ensure you don’t strain this wire. You can easily pull the two-pin loudspeaker wire connection off the main board. This frees up things to give more access to the innards.
The main front panel connection cable (a silver ribbon, 15mm wide) is quite sturdy and simply slides out of its PCB connector embedded in the front panel on the left, so note which way round the blue ‘pull tab’ goes and pull the ribbon wire gently out. (You can choose to leave this connected if you have the dexterity to work around it, but you may find it slips out accidentally anyway.)
;) Main board resting on the worktop, display PCB arrowed
Main board resting on the worktop, display PCB arrowed;) The OLED display ribbon in situ, note pins 1-22 markedThe OLED display connects using a flexible printed circuit board ribbon. The connector is probably hidden under some masking tape which can be removed.
The OLED display ribbon in situ, note pins 1-22 markedThe OLED display connects using a flexible printed circuit board ribbon. The connector is probably hidden under some masking tape which can be removed.
;) Showing how the connector latches must be disengaged before disconnecting the ribbonDO NOT PULL THE RIBBON OUT! It’s numbered 1 and 22 to show the polarity of the flexible cable. Look closely at how the OLED ribbon is seated in the connector, which has a black plastic clamp to secure it in place.
Showing how the connector latches must be disengaged before disconnecting the ribbonDO NOT PULL THE RIBBON OUT! It’s numbered 1 and 22 to show the polarity of the flexible cable. Look closely at how the OLED ribbon is seated in the connector, which has a black plastic clamp to secure it in place.
;) Use a pointed tool or maybe a fingernail to slide out the retaining latch at both endsA pointed plastic tool (or your fingernails) must be used to slide the black plastic clamp outwards to the edge of the PCB. It’s effectively just one latch with two handles on the end that pop out evenly about 2mm, and then gently slide out the display’s flexible ribbon.
Use a pointed tool or maybe a fingernail to slide out the retaining latch at both endsA pointed plastic tool (or your fingernails) must be used to slide the black plastic clamp outwards to the edge of the PCB. It’s effectively just one latch with two handles on the end that pop out evenly about 2mm, and then gently slide out the display’s flexible ribbon.
;) Then remove the flexible ribbon from the connectorThe rear of the OLED plastic housing is detached by removing four small Philips screws.
Then remove the flexible ribbon from the connectorThe rear of the OLED plastic housing is detached by removing four small Philips screws.
;) The four Philips screws (circled) are removed nextYour display is probably screened with adhesive copper foil stuck to it. The display is merely stuck with double sided tape around the edges of the display. It is easy to gently pry it off using a plastic spudger tool and it will come away.
The four Philips screws (circled) are removed nextYour display is probably screened with adhesive copper foil stuck to it. The display is merely stuck with double sided tape around the edges of the display. It is easy to gently pry it off using a plastic spudger tool and it will come away.
;) Carefully pry the display away off the adhesive border
Carefully pry the display away off the adhesive border
I FOUND THE NEW DISPLAY NEEDS TO BE STUCK ON ‘UPSIDE DOWN’ COMPARED WITH THE OLD ONE, TO ALIGN THE 1-22 PINOUTS OF THE PCB CONNECTOR.
;) On this new display, the ribbon sprouts from the TOP edge and needs folding back. Compare yours carefully!Clean the window if necessary with eg a little Isopropanol. Unpeel the clear protection poly film off the new display. The OLED can be applied and stuck down, aligning it in the radio's display window as best you can. Depending on the type that you purchase, the flat flexible ribbon might sprout out of the TOP instead, if so, fold it over downwards towards the controller PCB so the 1-22 pinout markings are visible on the ribbon as before. The old adhesive should still be strong enough but you'll be able to lift and reposition the display if necessary.
On this new display, the ribbon sprouts from the TOP edge and needs folding back. Compare yours carefully!Clean the window if necessary with eg a little Isopropanol. Unpeel the clear protection poly film off the new display. The OLED can be applied and stuck down, aligning it in the radio's display window as best you can. Depending on the type that you purchase, the flat flexible ribbon might sprout out of the TOP instead, if so, fold it over downwards towards the controller PCB so the 1-22 pinout markings are visible on the ribbon as before. The old adhesive should still be strong enough but you'll be able to lift and reposition the display if necessary.
;) My replacement display fitted in place. Yours might look different. Main thing is to ensure the pinouts 1 > 22 align the right way roundRe-assembly, as they famously say, is the reverse of the above. Pass the OLED ribbon through the slot in the black plastic housing and screw down with 4 Philips screws.
My replacement display fitted in place. Yours might look different. Main thing is to ensure the pinouts 1 > 22 align the right way roundRe-assembly, as they famously say, is the reverse of the above. Pass the OLED ribbon through the slot in the black plastic housing and screw down with 4 Philips screws.
I obtained a small reel of 50mm adhesive copper tape from Ebay and stuck it over the black plastic housing. That's optional.
To re-connect the OLED to the PCB, you must ensure the black plastic latches are STILL OUT by a few millimetres then gently slide the connector ribbon in as far as it will go. You'll know it's right when the bare copper conductors on the end of the flexible ribbon disappear into the housing, after which it can't go any further. Gently but firmly slide the black plastic latches inwards again to clamp the ribbon evenly in place.
If necessary, re-insert the silver front panel ribbon, the right way round, into its own connector ensuring the flat ribbon is even and flush with the connector.
Reconnect the loudspeaker and close up the housing by 'swinging it back into' the case, starting at the left-hand (telescopic aerial) side, always taking care not to strain the blue SnoozeHandle wire, then screw the rear back onto the housing.
;) Powered up and working again! [click to see]The radio can then be powered up and tested. Mine worked immediately, even after all this time it remembered the settings and found my LAN again. The remote control worked again too with new batteries (remember there is a 'Hardware Bind' button in the remote, to pair it that way if needed). Surprisingly, my radio then updated its firmware over Wi-fi to V5.1.The display active/ standby brightness can be dimmed via the Options menu if it is too bright.
Powered up and working again! [click to see]The radio can then be powered up and tested. Mine worked immediately, even after all this time it remembered the settings and found my LAN again. The remote control worked again too with new batteries (remember there is a 'Hardware Bind' button in the remote, to pair it that way if needed). Surprisingly, my radio then updated its firmware over Wi-fi to V5.1.The display active/ standby brightness can be dimmed via the Options menu if it is too bright.

 Alan W
Copper foil screening
Just to clarify about the copper foil stuck behind the display (used for shielding against interference) - mine was stuck down solidly and impossible to lift off. If you can re-use the old foil, it can only help.
In October I found some 50mm copper tape on Ebay which I stuck over the rear of the OLED, on the black plastic itself. Search for eg 'copper foil EMI tape' on eBay, there's plenty of choice for adhesive copper screening tape in every size. AW
Alan W
Can't win 'em all...
Sad to say, my replacement yellow display (as pictured) didn't last all that long - it faded and rows of pixels have failed altogether. I've replaced it with a second spare that I'd bought at the same time (for repairing for old time's sake 5-10 years from now). That too isn't as bright as it could be, but at least it works.
The original yellow OLEDs have all but disappeared from sale altogether now, so there is next to no chance of getting a new replacement. At the time of writing, a few WHITE ones are popping up on sale (Ebay etc.) , claiming to be brand new, so I'm trying one of those before they're all gone too.
Unless a stash of displays is unearthed from somewhere, it will soon become impossible to get another display once those white ones have been snapped up, so make the most of your Pure Evoke radio while you can. Consider unplugging and switching off altogether when it's not in use, to preserve those OLEDs as long as possible. AW
Alan W
Alibaba Yellow OLED
Well it's on the way - I've ordered one of these from China for about $27.00, also as suggested by other buyers so I'll see what they look like. I was pleasantly surprised to source one-offs via Alibaba, though the ordering system is a bit convoluted.
https://www.alibaba.com/product-detail/2-7-inch-128x64-12864-SSD1305_60671545961.html
More news as it happens! AW
Alan W
Fitting a Yellow OLED sourced via AliExpress
I fitted a Yellow OLED sourced from Shenzhen Liyuan Huida Technology Co., Ltd via Alibaba – a convoluted ordering process but everything arrived intact within ten days with no problems experienced.
I’m happy to say this is working perfectly, a nice bright yellow display just like the original and it dims as required.
Unfortunately the black plastic ribbon clamp somehow ‘pinged’ out from the board altogether. It has two tiny plastic spigots that align into each end of the PCB connector shown in my photos, the clamp being underneath the ribbon cable. When it’s pushed fully home, it sandwiches the ribbon firmly in place. Sadly, one of these spigots jammed and broke off (not surprised after all the hammer it’s had). However the other spigot is still intact, so I carefully re-inserted it underneath the OLED display ribbon, and pushed it home again. This seems to have held together so far. It can’t be repaired so let’s hope it stays that way.
It's best to use eg a plastic spudger or similar to ensure the clamp is only pushed out by a millimeter or so, and do not use excessive force.
Only time will tell whether the latest display will last or fade or drop some pixels, but it's looking great so far. I'll report findings back here. AW
Reader Comments (242)
Is this display also fits in a pure Oasis flow radio?
According to this item yes it is, but I cannot verify it myself. Oasis Flow display on Ebay (sold out)
Thank you.
It seems to be the same.
Do you have also an instruction guide for replacement of the display from an pure oasis flow. Or some hints?
Unfortunately I have no experience at all of the Oasis Flow, and they seem to be rare/ expensive on eg Ebay, so I'm sorry I cannot help.
Thanks for the article just replaced my screen on EVOKE-1S
You need to remove the front knobs then nuts. Fortunately got them back together you need to remove aerial screw as well. Bought my replacement of ebay £24.99 Expensive but i like the set. I will look into putting some rechargeable cells into to save the screen not the expensive pack
Great write up. It meant I was brave enough to to attempt (successful) replacing my screen on my Evoke 1S Marshall.
I found a screen on eBay, white rather than yellow, but better than a blank screen.
My model was different to the described in that the main board was attached to the front of the case rather than the back.
So here's my update.
Remove rear screws as described here, but also need to remove the one for the aerial.
Lever back of case as described.
Unplug the cables from back panel to main board. I marked one side of plug and socket to make sure they went back the same way.
Now remove the six screws holding the chassis to the case.
Pull the two knobs from the front, and remove the retaining nuts.
Unscrew the nut holding the heat sink to the voltage regulator.
Unplug the screen from main board, being careful with the clips (as descibed).
Unscrew the six screws holding the main board to the chassis. This removes the heat sink and also gives access to the inside of the front panel.
Undo the two screws holding the block that keeps the screen in place, and the screen should just lift out.
And as the say in the classics, rebuild is the opposite.
Hope this helps someone.
Just to say another very grateful reader. Got my radio back after following your helpful instructions. Thank you so much.
Andy
I successfully repaired mine, following your instructions. I used the white (WEX012864DWPP3N00000) version of the display, sourced from First Components. The glass was slightly larger than the original one that came out, and I had to modify the four corners on the retaining plate to which it sticks. They looked like they were moulded to have two size options, and a minute or two with a sharp stanley knife had the inner corners removed. The new glass then fitted perfectly.
Despite your warnings, and taking care, I managed to break the blue Snooze wire clean off the face of the circuit board. If this happens to you, don't panic! Immediately above the circuit board is a small lump of ferrite with a couple of windings of wire through it, and some heat shrink over the top.
A quick touch of the soldering iron had the wire stump removed from the circuit board hole. I then snipped the two and a half loops of wire off the ferrite, leaving eight holes showing. Using some solid core, narrow gauge wire (harvested from some old telephone/bell wire), I re-threaded the ferrite with the two and a half turns, pulling tightly after each hole. I then re-soldered one end to the circuit board, shrunk some heatshrink over the ferrite, and finally reattached the blue wire to the other end. Not difficult at all in the end.
It's now all back together again, working perfectly.
Thanks Alan, I'm now listening to my Evoke flow again for the first time in months. I got my display from First Components (like Andy). It's white and bright. I was able to (very carefully) peel off the copper foil and reuse it. I notice that you don't mention the flat ferrite bead around the display ribbon cable. Perhaps they don't all have it, but if you have one I would recommend transferring it to the new display. I've also set my display to always blank after 7 sec in the hope it will last longer.
Does anyone know if the problems with displays from the New Pure radios still have bad displays? Or are they using now better displays?
Just a line to say thank you..
Have just used a First Components White Module (purchased back in June) to revive my Evoke Flow..
Thank you for all the guidance and suggestions. All as above, and like Mark the glass was just that bit longer, Stanley knife was similarly used to get rid of the inner corners.
Thanks again, Dan
Thank you; with the benefit of your great tutorial and reader posts I was able to renew the display on my Pure Evoke 1S at the weekend. The part came from eBay and works fine. I had a bit of trouble getting one of the dials to work after reassembly but have managed to fix that. If anyone needs any advice on doing this do respond to this post.
Thanks again, Geoff
So glad I've found this site. Am going to order from First Components. Just a question
though - do I need the display connector they sell with it? Thanks all!
It sounds like the connector is the one you would fit to a printed circuit board. It can't be anything else really (if it was the ribbon cable, they'd surely say so), but you're just swapping the display using the existing connector. So I'd say no you don't need it, and no-one else has mentioned that they bought the connector.
I've just fitted a replacement display to my Evoke Flow from Comet - https://store.comet.bg/en/Catalogue/Product/50969/#e30%3D
My issue is now everything is backwards on the display, like mirror writing. Anyone have any idea what I've done wrong?! Or have I been given a faulty display?
The 1-22 ribbon numbers were the same etc
Hi, the problem with a mirror image display is a known one, there are some answers (explanations anyway) in the blog comments earlier on, but I hate to say it is believed that nothing can be done without changing the radio's firmware, and as that's proprietary it can't be done :((. It's down the the driver chip used in certain displays and the radio's source code. AW
Hi Alan,
Just a follow up on the replacement display for the Pure Flow radios.
The new RiTdisplay (P35801) uses a different driver IC to the original P19301. But this is not the reason why it gives a mirrored image; that, I have learnt, is due to the pixel configuration of the P19301 and the software initialisation needed for it.
For some reason, RiT configured the original display with the pixel address origin in the bottom left corner, whereas newer displays (such as the P35801) define the bottom right corner as the origin. The consequence is that the Pure firmware write backwards to the newer displays.
There is also the minor difference that the original display driver IC has a graphics RAM with a 132x64 dot matrix, whilst most others are 128x64 dots, giving the image a 4 pixel offset to the left with the new display.
There were at least 2 other makers of the original display, Winstar and Bolymin; they are direct replacements for the RiTdisplay original, but are equally scarce now.
It would be possible to use replacement 128x64 pixel displays in the Flow radios if the firmware display initialisation were modified so that the data is read to the display from left to right. Unfortunately, I doubt that Pure's current owners would be interested in releasing a new software version.
Regards,
John
A big thank you from me also for this great tutorial and correspondence. I have just replaced the display on my Evoke Flow pretty successfully. I used the Winstar white display from First-Components (WEX012864DWPP3N00000) and it works perfectly. I would advise against using a cheaper display from Comet in case you get the above problem of reversal.
One problem I had was that with the display held in place under the plastic holder with the 4 screws, the ribbon cable barely reached its little socket and I could not plug it in. (The ribbon comes out of the top instead of bottom of display as described in the tutorial and won't quite reach.) I therefore dispensed with the holder and the display seems to stick in place anyway and I was then able to plug the ribbon in. All fine so far - hope it doesn't drop down at some point! Thanks again for this great page. Nick.
Many thanks indeed for your advice and guidance. Just fitted my new (expensive at approx £50) kit from First Components Store and works straight away... lovely. If purchasing from this source DO NOT BUY A CONNECTOR which is not needed, seems to be a tiny set of pins which are not needed and therefore a waste of £4. Cheers, Adrian.
Hello
I have taken the back off my Pure Evoke and find that the OLED display ribbon seems to be stuck with some sort of off-white silicon sealer at each end. Any idea how best to remove the ribbon in such circumstances? At first glance it looks like it might not be easy or perhaps impossible. By the way, I have confirmation that First Components in Italy have a suitable screen in stock, part number WEX012864DWPP3N00000
I haven't seen that before on this radio, it's probably a rubbery sealant to act as a strain relief and safeguard against vibration or stop the ribbon cable working itself out (being a portable radio). Or, it's been repaired before.
Without seeing it, if the ribbon cable won't budge you could try softening it with a safe solvent such as isopropanol (or rubbing alcohol, 70/30 isoprop/ distilled water) and/ or try scraping enough away or use a scalpel on it. Either way, if it's sticking the ribbon down it has to come off if the ribbon is to be removed.
Have had good reports about the First Components part, but pricey at £50 depending on exchange rates.
Yellow bright LEDs are currently available on AliBaba. I was originally offered a dim one a month ago which I declined, got a message a couple of days ago saying more bright ones in stock and a photo of a bright LED. On it's way, will report back once arrived.
Mainly to Robert Binning:
If the Alibaba display works well, please would you also supply the part number or other reference in your update, as I could not find these displays on the Alibaba website. No rush - I am waiting on your verdict as to suitability. Thanks
I've got a Pure Sirocco 550 which looks to have the same model of display, anyone have any experience with replacing this display?
I'm in Australia, so sourcing via Alibaba would make more sense than first components, any recent confirmation on the brightness of the recrent alibaba displays?
Just to respond to my own post, Jack from Shenzhen Liyuan Huida Technology Co., Ltd. has written saying
"This batch of this display is new screen and with 100% full brightness.
Please don't worry about that.
Before this batch display, we have some pieces of dim ones. We told buyers that before they decided to buy them and sent actual pictures to them. And we gave them at very low price of USD5/pcs for dim ones.
Now,this batch displays are good ones with high price.
So,please don't worry about that."
So I've ordered, and have crossed my fingers and toes.